2021年3月17日 星期三

2021年1月21日 星期四
2020年9月10日 星期四
2020年8月13日 星期四
2020年6月14日 星期日
2020年5月20日 星期三
2020年5月14日 星期四
2020年4月12日 星期日
2020年3月23日 星期一
[BIG-IP-LTM] LAB TMSH 指令設定
[BIG-IP-LTM] LAB TMSH 指令設定
設定 hostname
tmsh modify sys global-settings hostname Locallab01.localdomain

建立 VLANs
tmsh create net vlan external interfaces add {1.2}
tmsh create net vlan internal interfaces add {1.1}

建立 Self IPS
tmsh create net self 172.16.1.254/24 vlan external
tmsh create net self 192.168.1.254/24 vlan internal

建立 Default Route
tmsh create net route Default_GW network 0.0.0.0/0 gw 172.16.1.254

建立 HTTP_POOL Pool
tmsh create ltm pool HTTP_POOL load-balancing-mode least-connections-member members add {192.168.1.11:80 192.168.1.12:80 192.168.1.13:80}

建立 HTTP_TEST Virtual Server
tmsh create ltm virtual HTTP_TEST destination 172.16.1.40:80 profiles add {tcp http} pool HTTP_POOL snat automap

Save the config
tmsh save sys config
2020年3月21日 星期六
[BIG-IP-LTM] 自動更新 letsencrypt 憑證及 更新LTM 上的 profile
[BIG-IP-LTM] 自動更新 letsencrypt 憑證及 更新LTM 上的 profile
有部分參考 這個網站 BIG-IP_Let'sencrypt
#!/usr/bin/env bash
# linux 主機要先更新 widecard-憑證
# 修改變數 請先到 cloudflar 取得 CF_key
# export CF_Key="YOUR_CLOUD_FLARE_API_KEY"
# export CF_Email="YOUR_CLOUD_FLARE_LOGIN_EMAIL"
# 確認自己的 要申請的憑證 網域
# DOMAIN=your-domain.com
# 網頁更新 /var/www/html/letsencrypt

    DOMAIN=bigtalk.info
    now=$(date +%Y-%m-%d)
    profile=auto_${DOMAIN}
    name=${DOMAIN}_${now}_lab_2
    dcert=${name}.crt
    dkey=${name}.key
    ocsp="letsencrypt-ocsp"
    KEYFILE="http://x.x.x.x/letsencrypt/keys/bigtalk.info.key"
    FULLCHAINFILE="http://X.X.X.X/letsencrypt/live/bigtalk.info/fullchain.pem"
        echo "key ${dkey} from file ${KEYFILE}"
        echo "key ${dcert}.crt from file ${FULLCHAINFILE}"

sleep 10

tmsh install sys crypto key ${name} from-url ${KEYFILE}
tmsh install sys crypt cert ${name} from-url ${FULLCHAINFILE}
#
sleep 2
#
tmsh modify ltm profile client-ssl ${profile} cert-key-chain replace-all-with { default { key $name cert $name } }
2020年3月17日 星期二
[BIG-IP-LTM] LAB 環境規劃
[BIG-IP-LTM] LAB 環境規劃
|
LAB環境是:
|
2020年3月16日 星期一
[BIG-IP-LTM] 將設定還原到其他機器
[BIG-IP-LTM] 將設定還原到其他機器
1. 備份設定檔 : : system -> archives -> create -> [enter file name] -> finish
 預設 archive saved to /var/local/ucs/
 You will receive message /var/local/ucs/ttt_ttt_ttt.ucs is saved.
使用CLI 備份: 使用 SSH -> tmsh -> save /sys ucs /var/local/ucs/xxx_xxx_xxx.ucs
2. Copy xxx_xxx_xxx.ucs from F5:
system -> archives ->click on xxx_xxx_xxx.ucs -> download xxx_xxx_xxx.uc
You will receive message /var/local/ucs/ttt_ttt_ttt.ucs is saved.
使用CLI 備份: 使用 SSH -> tmsh -> save /sys ucs /var/local/ucs/xxx_xxx_xxx.ucs
2. Copy xxx_xxx_xxx.ucs from F5:
system -> archives ->click on xxx_xxx_xxx.ucs -> download xxx_xxx_xxx.uc


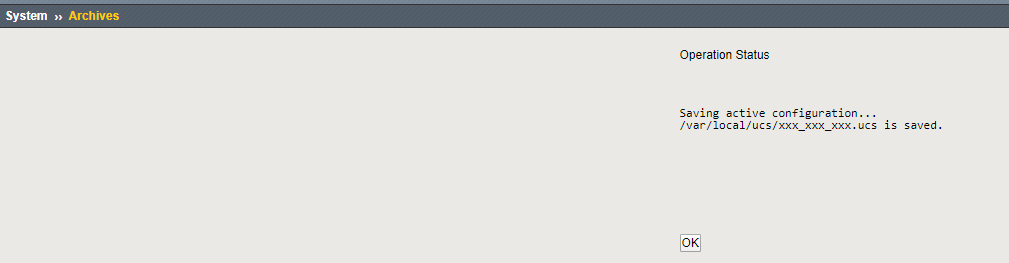 You will receive message /var/local/ucs/ttt_ttt_ttt.ucs is saved.
使用CLI 備份: 使用 SSH -> tmsh -> save /sys ucs /var/local/ucs/xxx_xxx_xxx.ucs
2. Copy xxx_xxx_xxx.ucs from F5:
system -> archives ->click on xxx_xxx_xxx.ucs -> download xxx_xxx_xxx.uc
You will receive message /var/local/ucs/ttt_ttt_ttt.ucs is saved.
使用CLI 備份: 使用 SSH -> tmsh -> save /sys ucs /var/local/ucs/xxx_xxx_xxx.ucs
2. Copy xxx_xxx_xxx.ucs from F5:
system -> archives ->click on xxx_xxx_xxx.ucs -> download xxx_xxx_xxx.uc

[BIG-IP-LTM] 使用指令建立 pool和 pool member
[BIG-IP-LTM] 使用指令建立 pool和 pool member
#建立 node
tmsh create ltm node node_172.100.0.6 address 172.100.0.6

#建立 pool 即加入 pool_member
tmsh create ltm pool poolname monitor tcp load-balancing-mode least-connections-member members add { node_172.100.0.6:80 }

#一行指令設定完成
tmsh create ltm pool poolname monitor tcp load-balancing-mode least-connections-member members add { node_172.100.0.5:80 { address 172.100.0.5 } }
#
tmsh create ltm pool poolname_8000 monitor tcp load-balancing-mode least-connections-member members add { node_10.100.0.5:80 { address 10.100.0.5 } }

#設定 virtual server
tmsh create ltm virtual vs_Name_8000 { destination 10.23.30.4:8000 ip-protocol tcp mask 255.255.255.255 pool poolname_8000 profiles add { fastL4 } translate-address disabled translate-port disabled  source 0.0.0.0/0 }

tmsh save sys config
訂閱:
文章 (Atom)